Butternut squash tarte tatin tastes divine. While it looks complicated, it is not. The only cooking you need to do is melt a pat of butter. Then into the oven it goes for baking 25 to 30 minutes. And clean-up? One pan. It could not be easier for such a spectacular presentation.
Usually classic French apple tarte tatin is made with caramel sauce on the bottom. However, no added sugar or honey is needed. Rely on the natural sugars in the squash and nuts. Amaretti is made with sugar, sufficient to sweeten this tarte. The layering of ingredients provides buttery crunch and savory sweetness from the butternut squash with every bite. Then there are surprises – a taste of walnut, hazelnut, or pistachio, perhaps a hint of orange or nutmeg topped off with deep bittersweet chocolate.
Purchase a small to medium-size butternut squash, weighing about 1 1/2 pounds (680 g). Use the neck for the tarte reserving the base for other uses. It does not need any pre-cooking. (If you have allergies to any of these ingredients, or they are not available, substitute as you wish.)
* The explanation of techniques is lengthy in the hope I answer questions before you make this dessert. Do not be intimidated, Butternut Squash Tarte Tatin is incredibly easy to make. When I prepared the ingredients for this post, wouldn't you know…the oven died! Everything was sliced and chopped. The puff pastry was thawed and relaxed, and needed to be baked soon. Thank goodness I test kitchen equipment often, so I have two counter top ovens that work well. I changed pans from 10-inches to 8-inches so it would fit into the oven, then proceeded making the recipe. It worked beautifully, as shown in the photos! If it looks this good during a panic emergency, you know the recipe is not only easy but foolproof. And it is fabulous! I enjoyed every single bite. You will too, and you'll receive applause.
4 servings. Baking time is 30 to 35 minutes at 400 F/200 C/Gas Mark 6 for a 10-inch (25-cm) pan; 25 to 30 minutes for an 8-inch pan (20-cm); 22 to 25 minutes for a 6-inch (15-cm) pan. Baking time depends on how cold the ingredients are when the pan is put into the preheated oven. Avoid burning the edges of the dough or squash, so check at 20 to 23 minutes, then monitor.
Butternut Squash Tarte Tatin:
1 tablespoon (0.5 ounce or 14 g) unsalted butter
1 tablespoon (15 ml) extra-virgin olive oil
6 ounces (170 g) raw butternut squash for the base layer and fill-in, use the neck
2 ounces (57 g) raw butternut squash for the second layer, thin shards or shavings
1/2 cup chopped walnuts, hazelnuts, and pistachios (2 ounces or 57 g)
1/4 cup crushed amaretti (1 ounce or 28 g; 4 medium-size cookies)
Freshly grated orange zest to taste
Freshly grated nutmeg to taste
1/8 cup chopped 60-70% bittersweet chocolate (0.5 ounce or 14 g)
1 sheet frozen prepared puff pastry dough (8 ounces or 227 g), thawed, draped, then trim inside pan
Garnish:
Fresh Cheese: Whipped Ricotta or Mascarpone sweetened with powdered sugar or blue agave syrup to taste
OR Sweetened whipped heavy cream
Fresh mint leaves
1. Preparing the Butternut Squash: Using a sharp chef's knife, separate the neck from the base, reserving the bulbous base for another use. The amount of squash needed depends on the pan's size, so use these guidelines as reference. Make 3 different sizes of butternut squash as follows:
First Layer Base – Slices: Slices compose the first layer placed in the pan. This is the layer appearing on top of the tarte when plated. Cut off the outer rind of the squash neck. Then cut or use a mandoline to make evenly thick slices of about 1/4-inch to 3/8-inch thick (6.3-cm to 9.5-cm). If the slices are thicker, they require longer cooking and the puff pastry burns on the top. If the slices are very thin, they burn while the puff pastry is baking.
Fill-In Empty Spaces – Small Bits: Reserve one extra slice of squash for cutting into pieces to fill-in the empty spaces.
Second Layer Pieces – Thin Shards or Shavings: Make about 1 ounce (28 g) for 6-inch (15-cm) pan, and 1.5 ounces (43 g) for 8-inch (20-cm) pan, and 2 ounces (57 g) for 10-inch (25-cm) pan of shards, thin uneven slices to fill-in any gaps, about 1/8-inch (3-mm) thick at most. This layer must be thin, and can be uneven, so it is a great way to use up those odd-shaped bits of squash. If the shards or shavings are the same thickness as the base layer, they will not bake through entirely, and there will be two different textures for the squash – it’s your call on this.
Preparing the Nuts, Amaretti, and Chocolate: The amount of nuts, amaretti, and chocolate needed depends on the pan's size, so use the recipe amounts as guidelines. Keep these ingredients separate because the chocolate is added only on top of the second layer. Coarsely chop. Although not necessary, I strain each of them separately, separating and removing the tiny bits that could burn during baking.
Thaw one frozen puff pastry sheet for about 40 minutes, or just until easy to handle while cold. Preheat the oven to 400 F/200 C/Gas Mark 6.
2. The Pan: Choose an ovenproof, non-stick pan with sloping sides so the tarte slides out after baking. These sizes work very well: 6-inch (15-cm) for 2 servings, or 8-inch (20-cm) or 10-inch (25-cm) for 4 servings. Put the butter and olive oil in the pan. Over low heat, warm just until the butter melts, but do not brown it because the butter continues to cook in the oven. Remove the pan from the heat and cool down.
Layering:
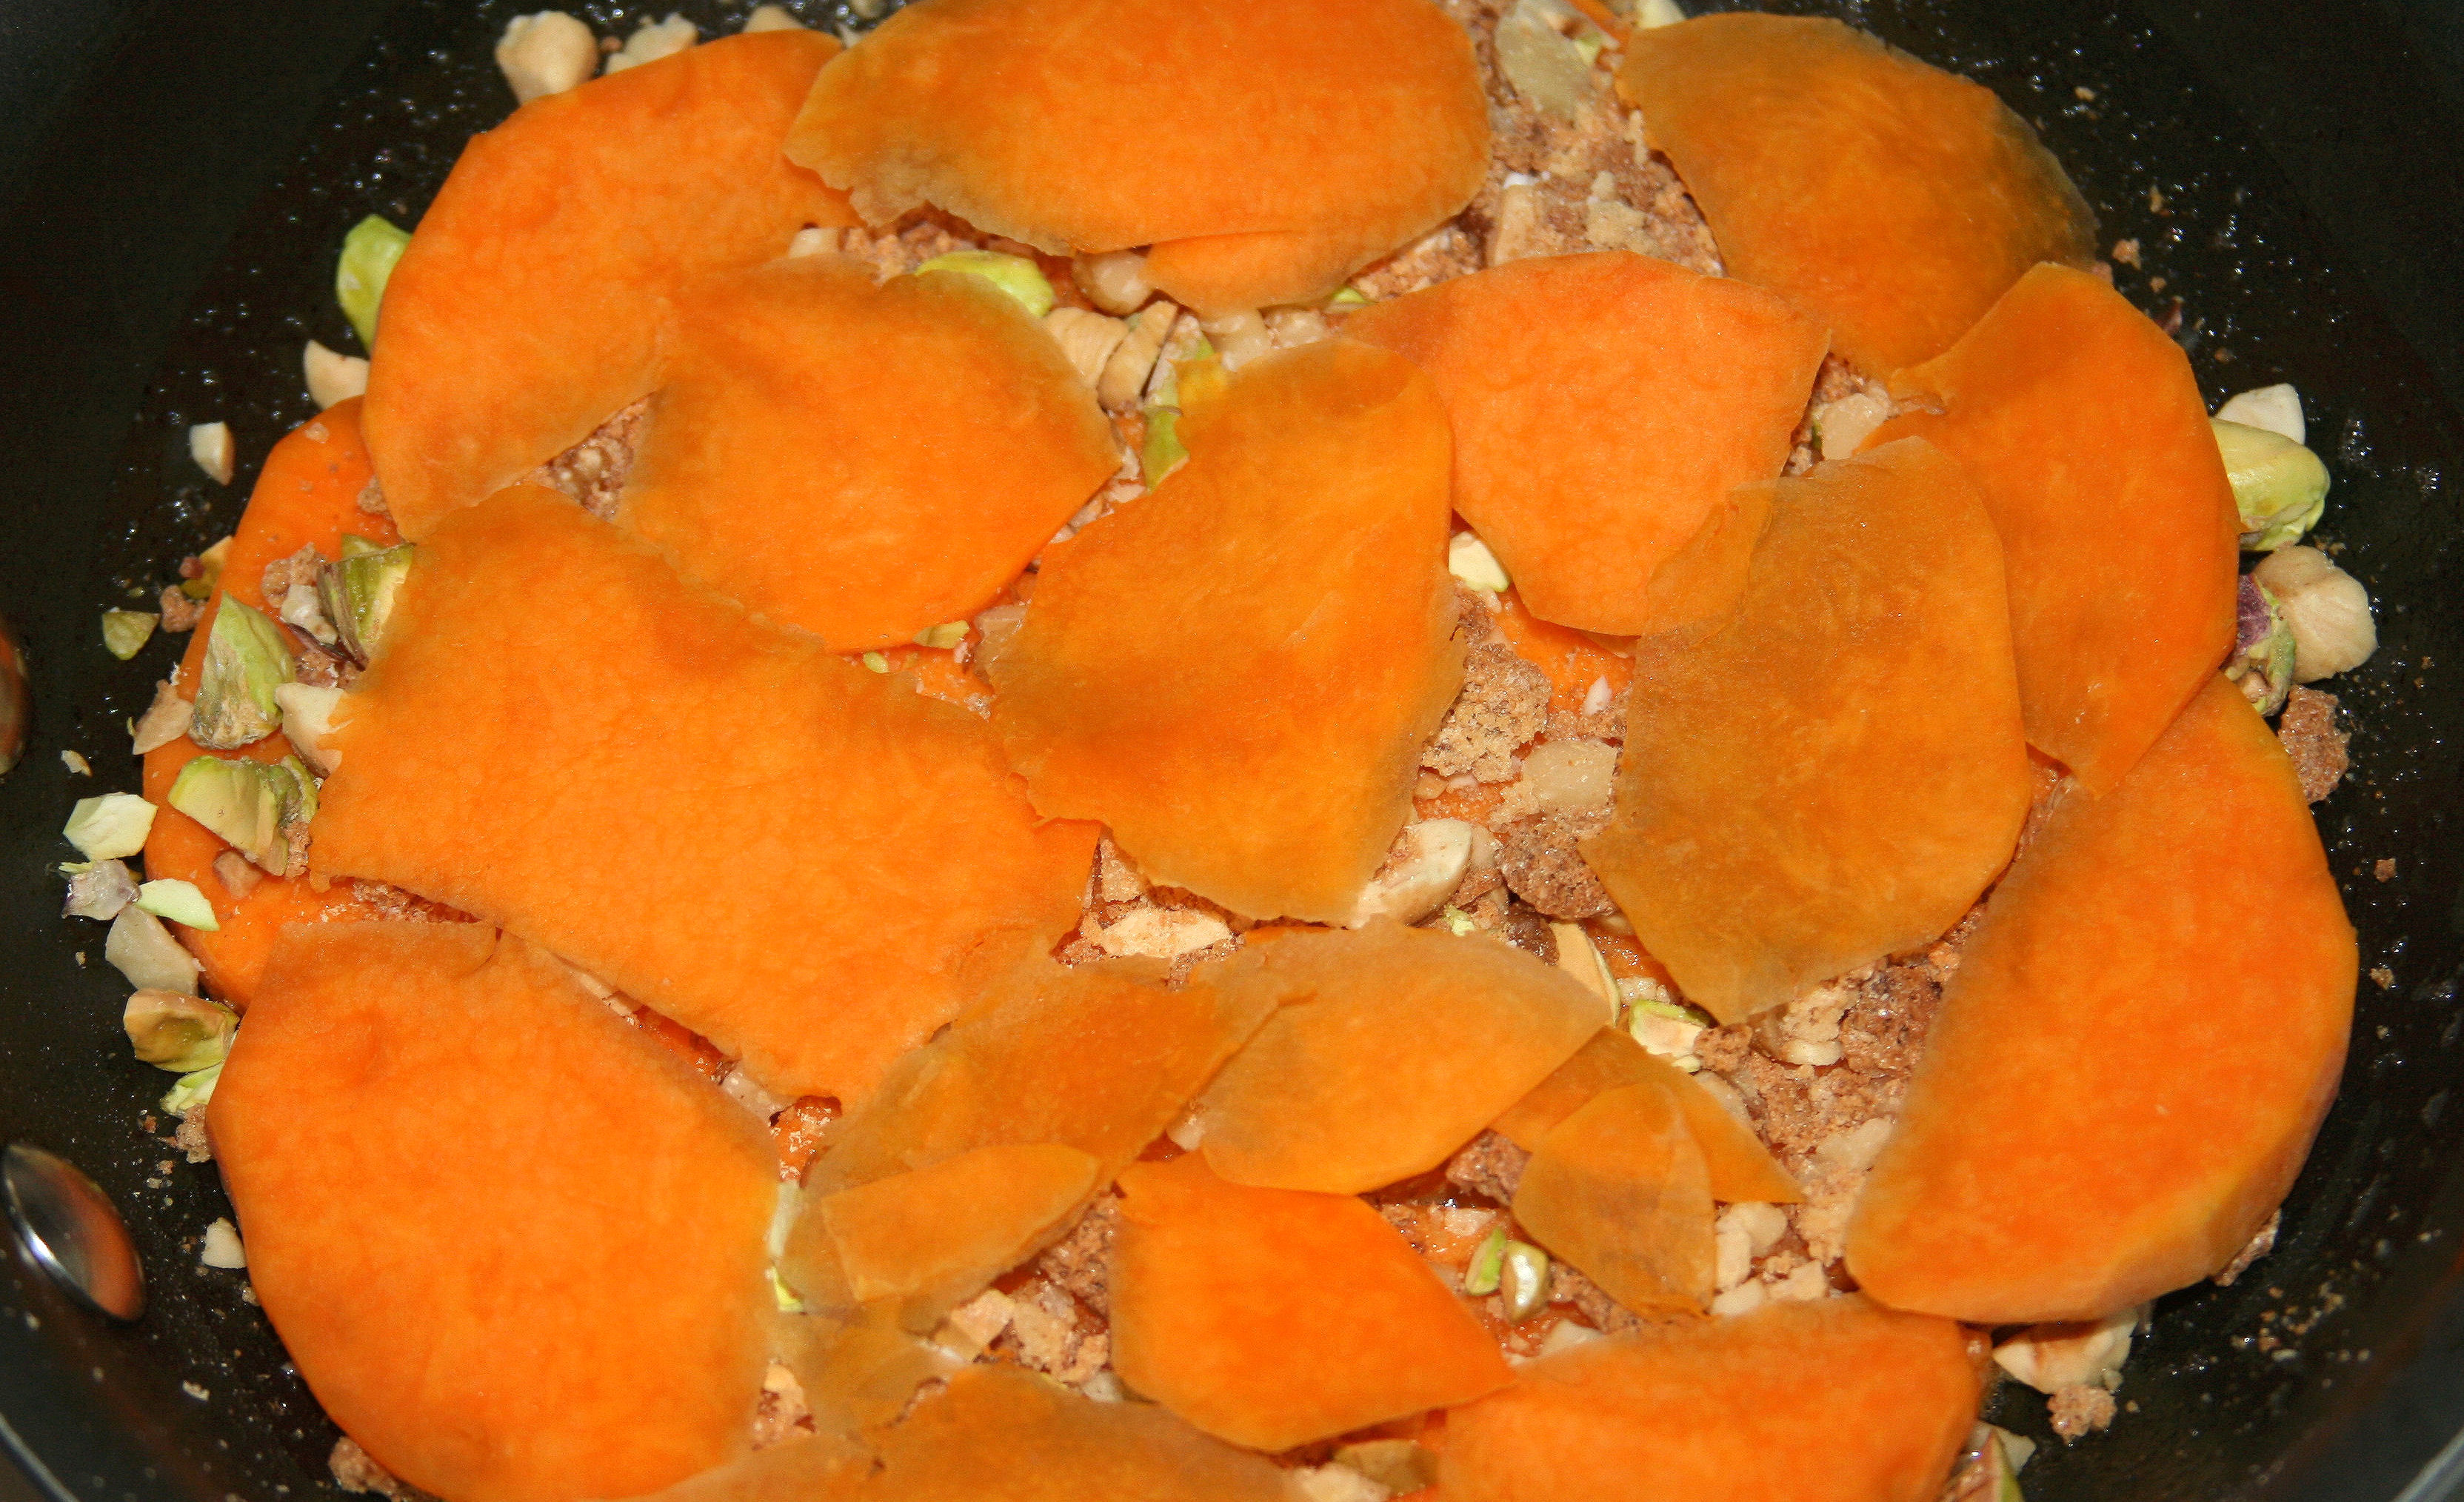
A. Arrange the squash slices in the pan. Turn them over in the pan so both sides are coated lightly with the melted butter and oil. During baking, the squash softens and shrinks a little, so crowd the pieces together and fill-in the spaces with the small squash pieces.
B. Sprinkle the chopped nuts and crushed amaretti cookies over the squash and in those empty spaces between the squash slices. Season to taste by grating a small amount of orange zest and nutmeg over the mixture.
C. Arrange thin shards or shavings on top covering gaps or spaces – but – leave air space, do not make one solid layer of squash.
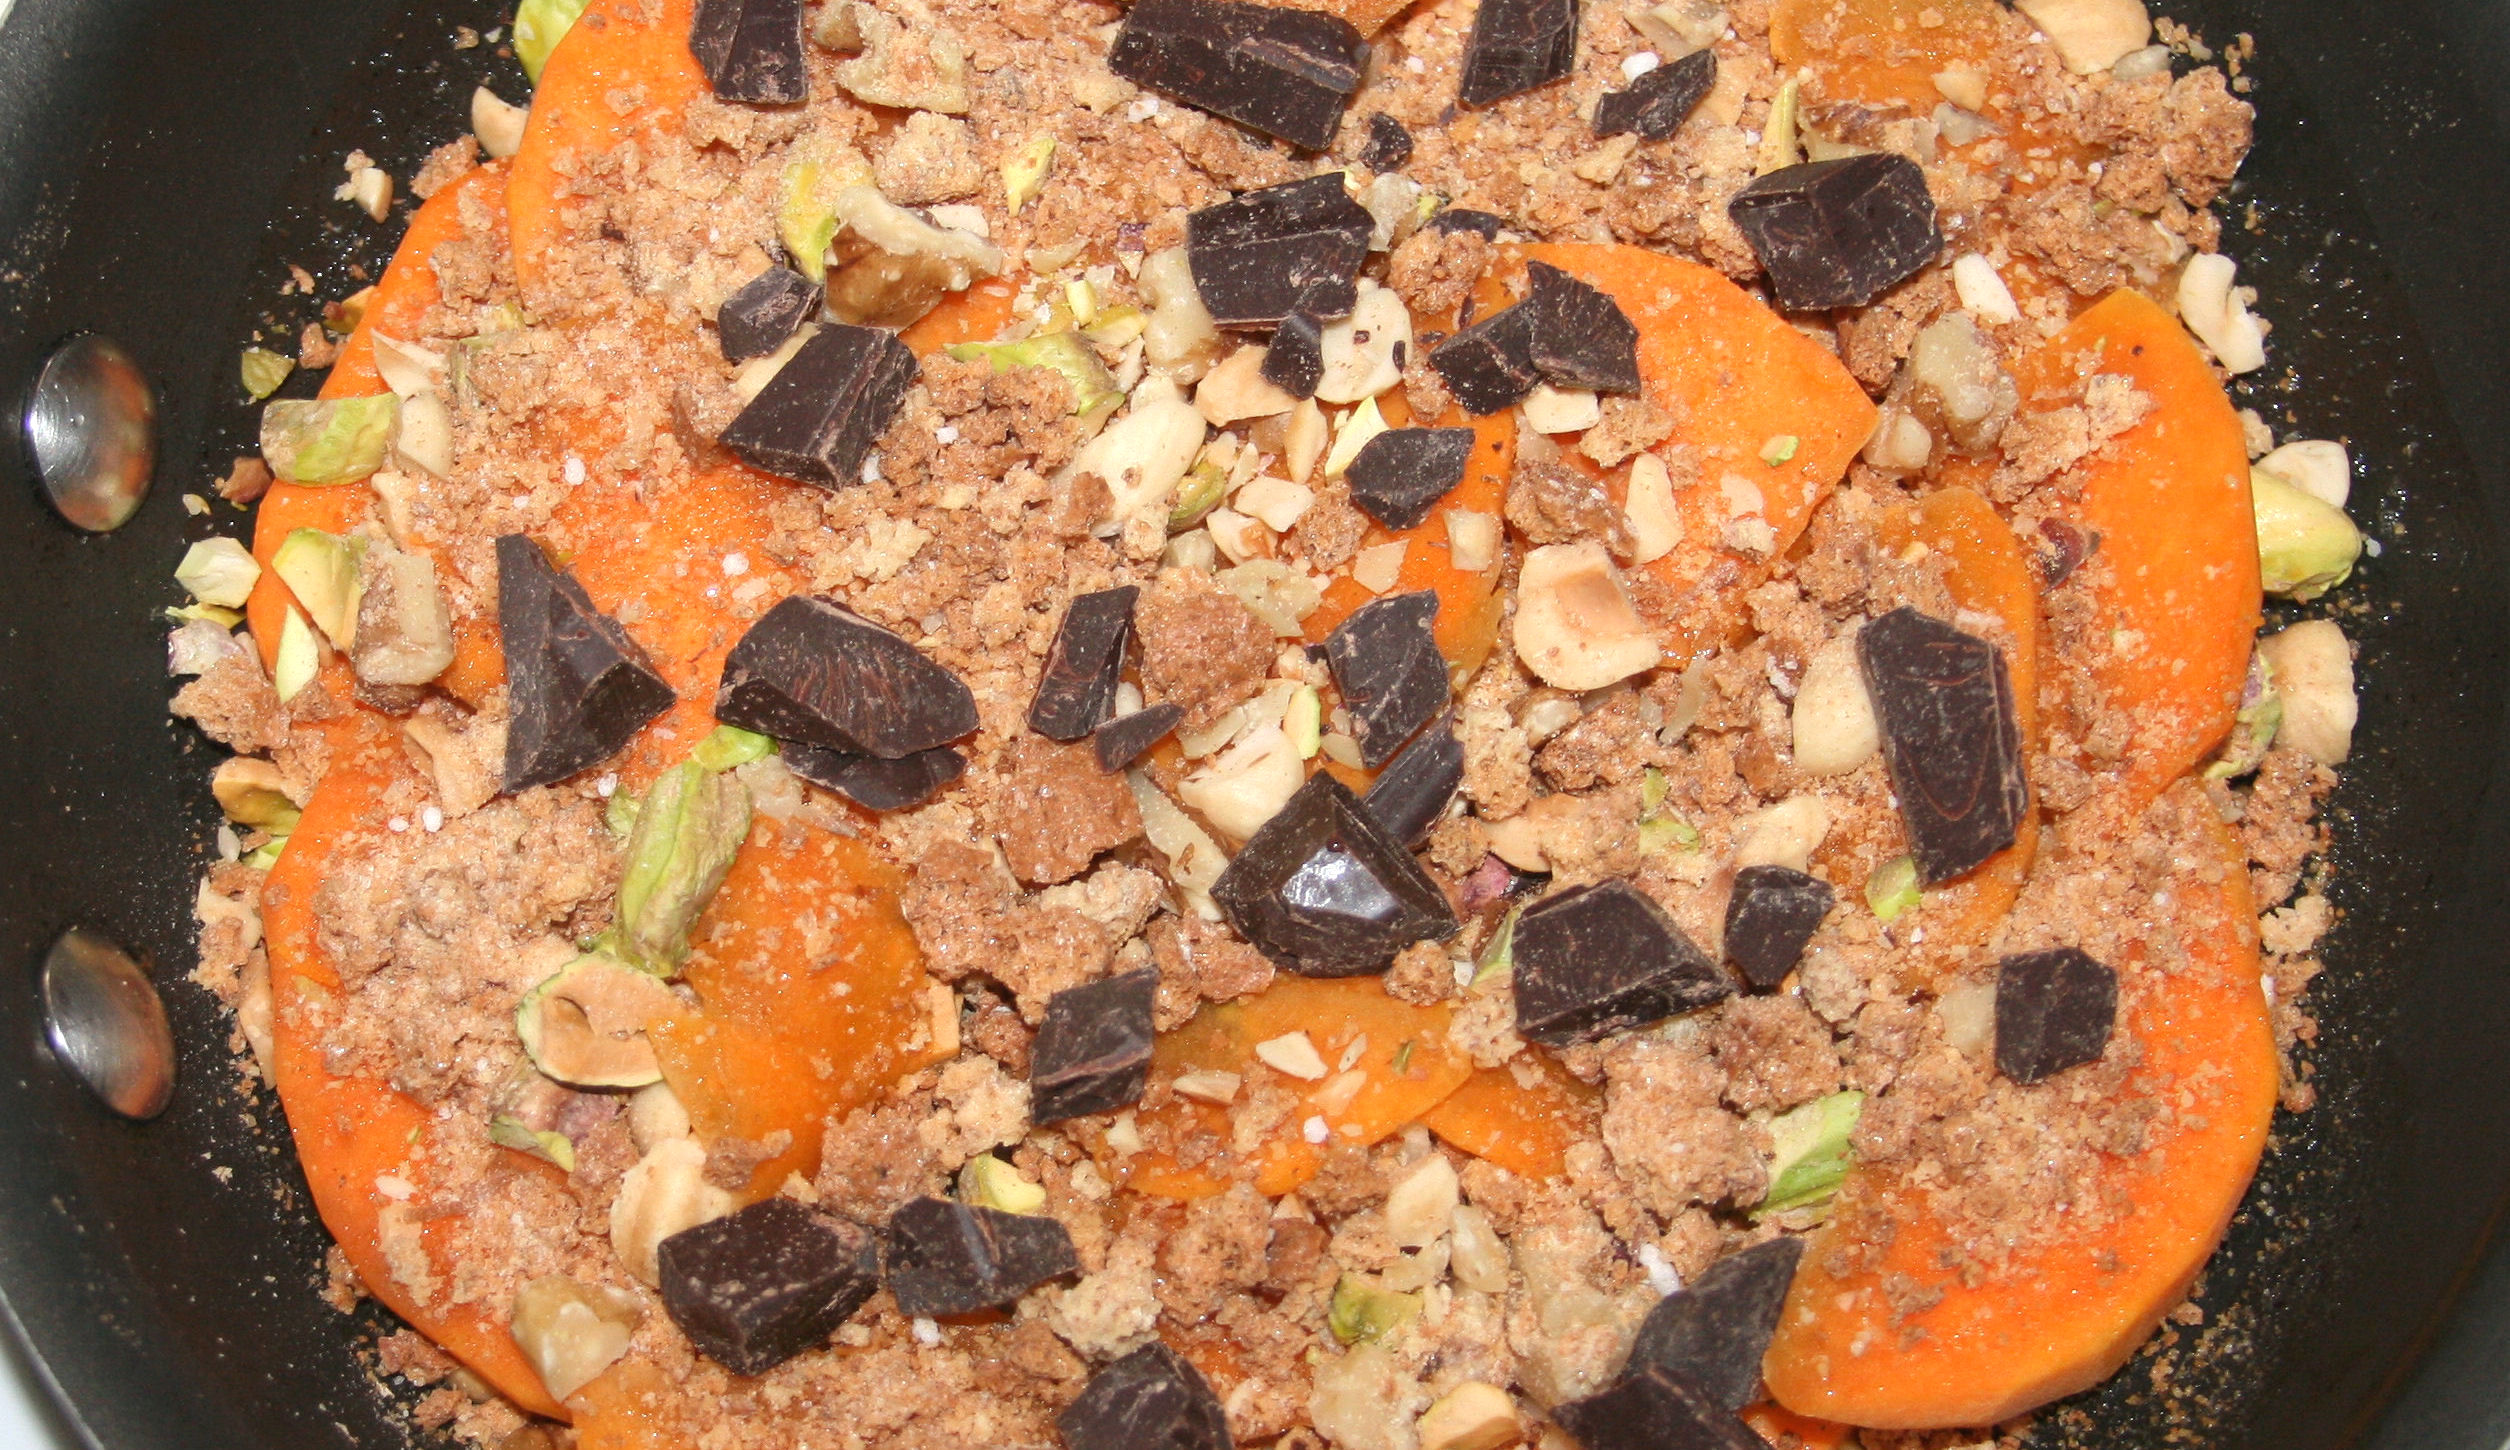
D. Sprinkle the rest of the chopped nuts and crushed amaretti cookies over the squash. Distribute the chopped chocolate pieces on top. Do not place the chocolate around the edges, or the chocolate could melt and ooze out onto the bottom of the pan and burn. Keep the chocolate hidden so it melts and is retained inside the tarte. It's a surprise!
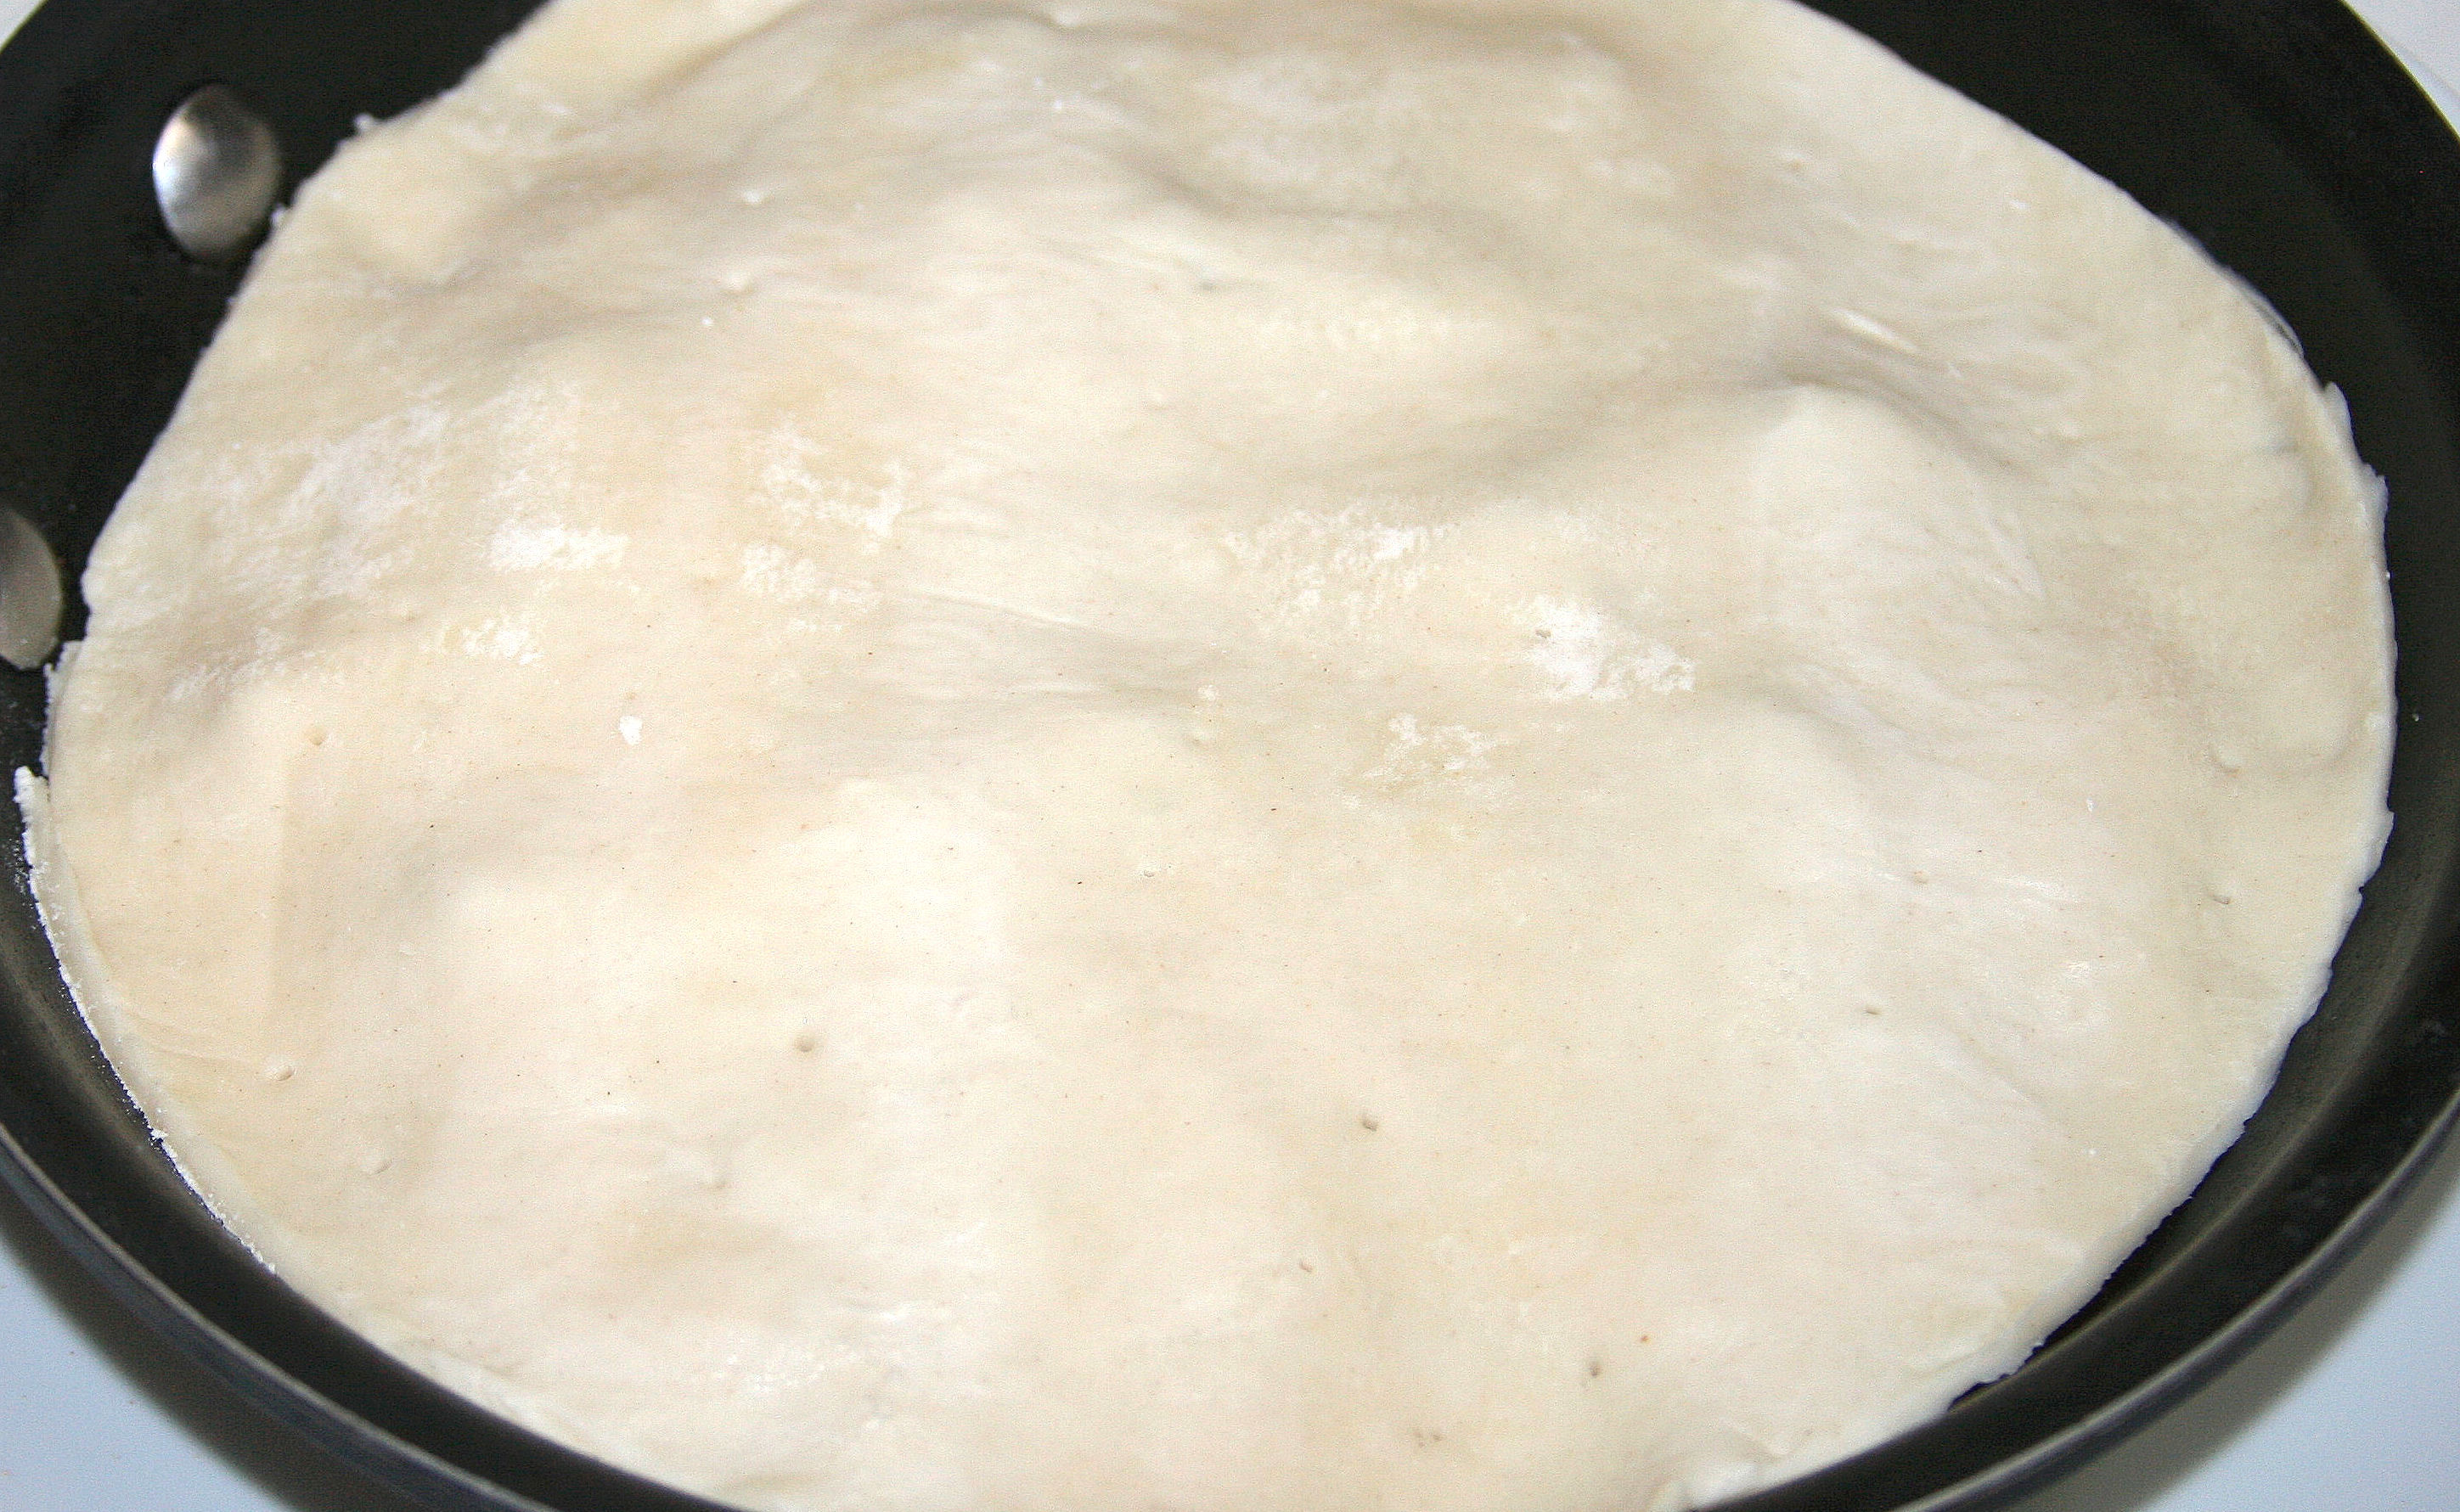
3. The Puff Pastry Topping: Carefully place the thawed sheet of puff pastry on top as the final layer. Drape it over the layered ingredients in an even layer without folds, and allow it to fall into place naturally during baking. There will be a few hills and valleys, that is fine, because it allows trapped air to help bake the pastry.
Using a kitchen shears or sharp paring knife, trim the edges so the pastry completely covers all and touches the side of the pan. Usually I cut the pastry against the side of the pan and that allows enough pastry for shrinking. When trimming, do not press down on the pastry. Leave the pastry completely covering the layers. Do not tuck the pastry ends down into the pan or beneath the layered squash since tucking in the ends prevents the puff pastry from rising. During baking the pastry shrinks by about 1/2-inch (13-mm) or more exposing the squash.
Prick the pastry intermittently with a fork or sharp tip of a paring knife so it rises slightly and evenly.
Do not slash the top of the pastry with a knife because it presses down on the pastry and the pastry does not bake evenly.
Do not brush any wash on top of the pastry.
*Using a damp paper towel, wipe inside the pan, above the tarte, removing any flour or ingredient bits that could burn during baking.
4. Baking: Place the pan in the center of the preheated 400 F/200 C/Gas Mark 6 oven.
During the first 15 minutes, the squash begins to cook and soften. The puff pastry is rising now. Open the oven door, and quickly turn the pan around a little, by simply moving the pan’s handle from one side of the oven to the other side for more even baking and rising of the puff pastry. Do not pick up the pan, or remove it from the oven, the pastry would collapse. Carefully close the oven door. Do not let it slam shut anytime you’re baking something that is rising, as the jarring could cause the rise to collapse.
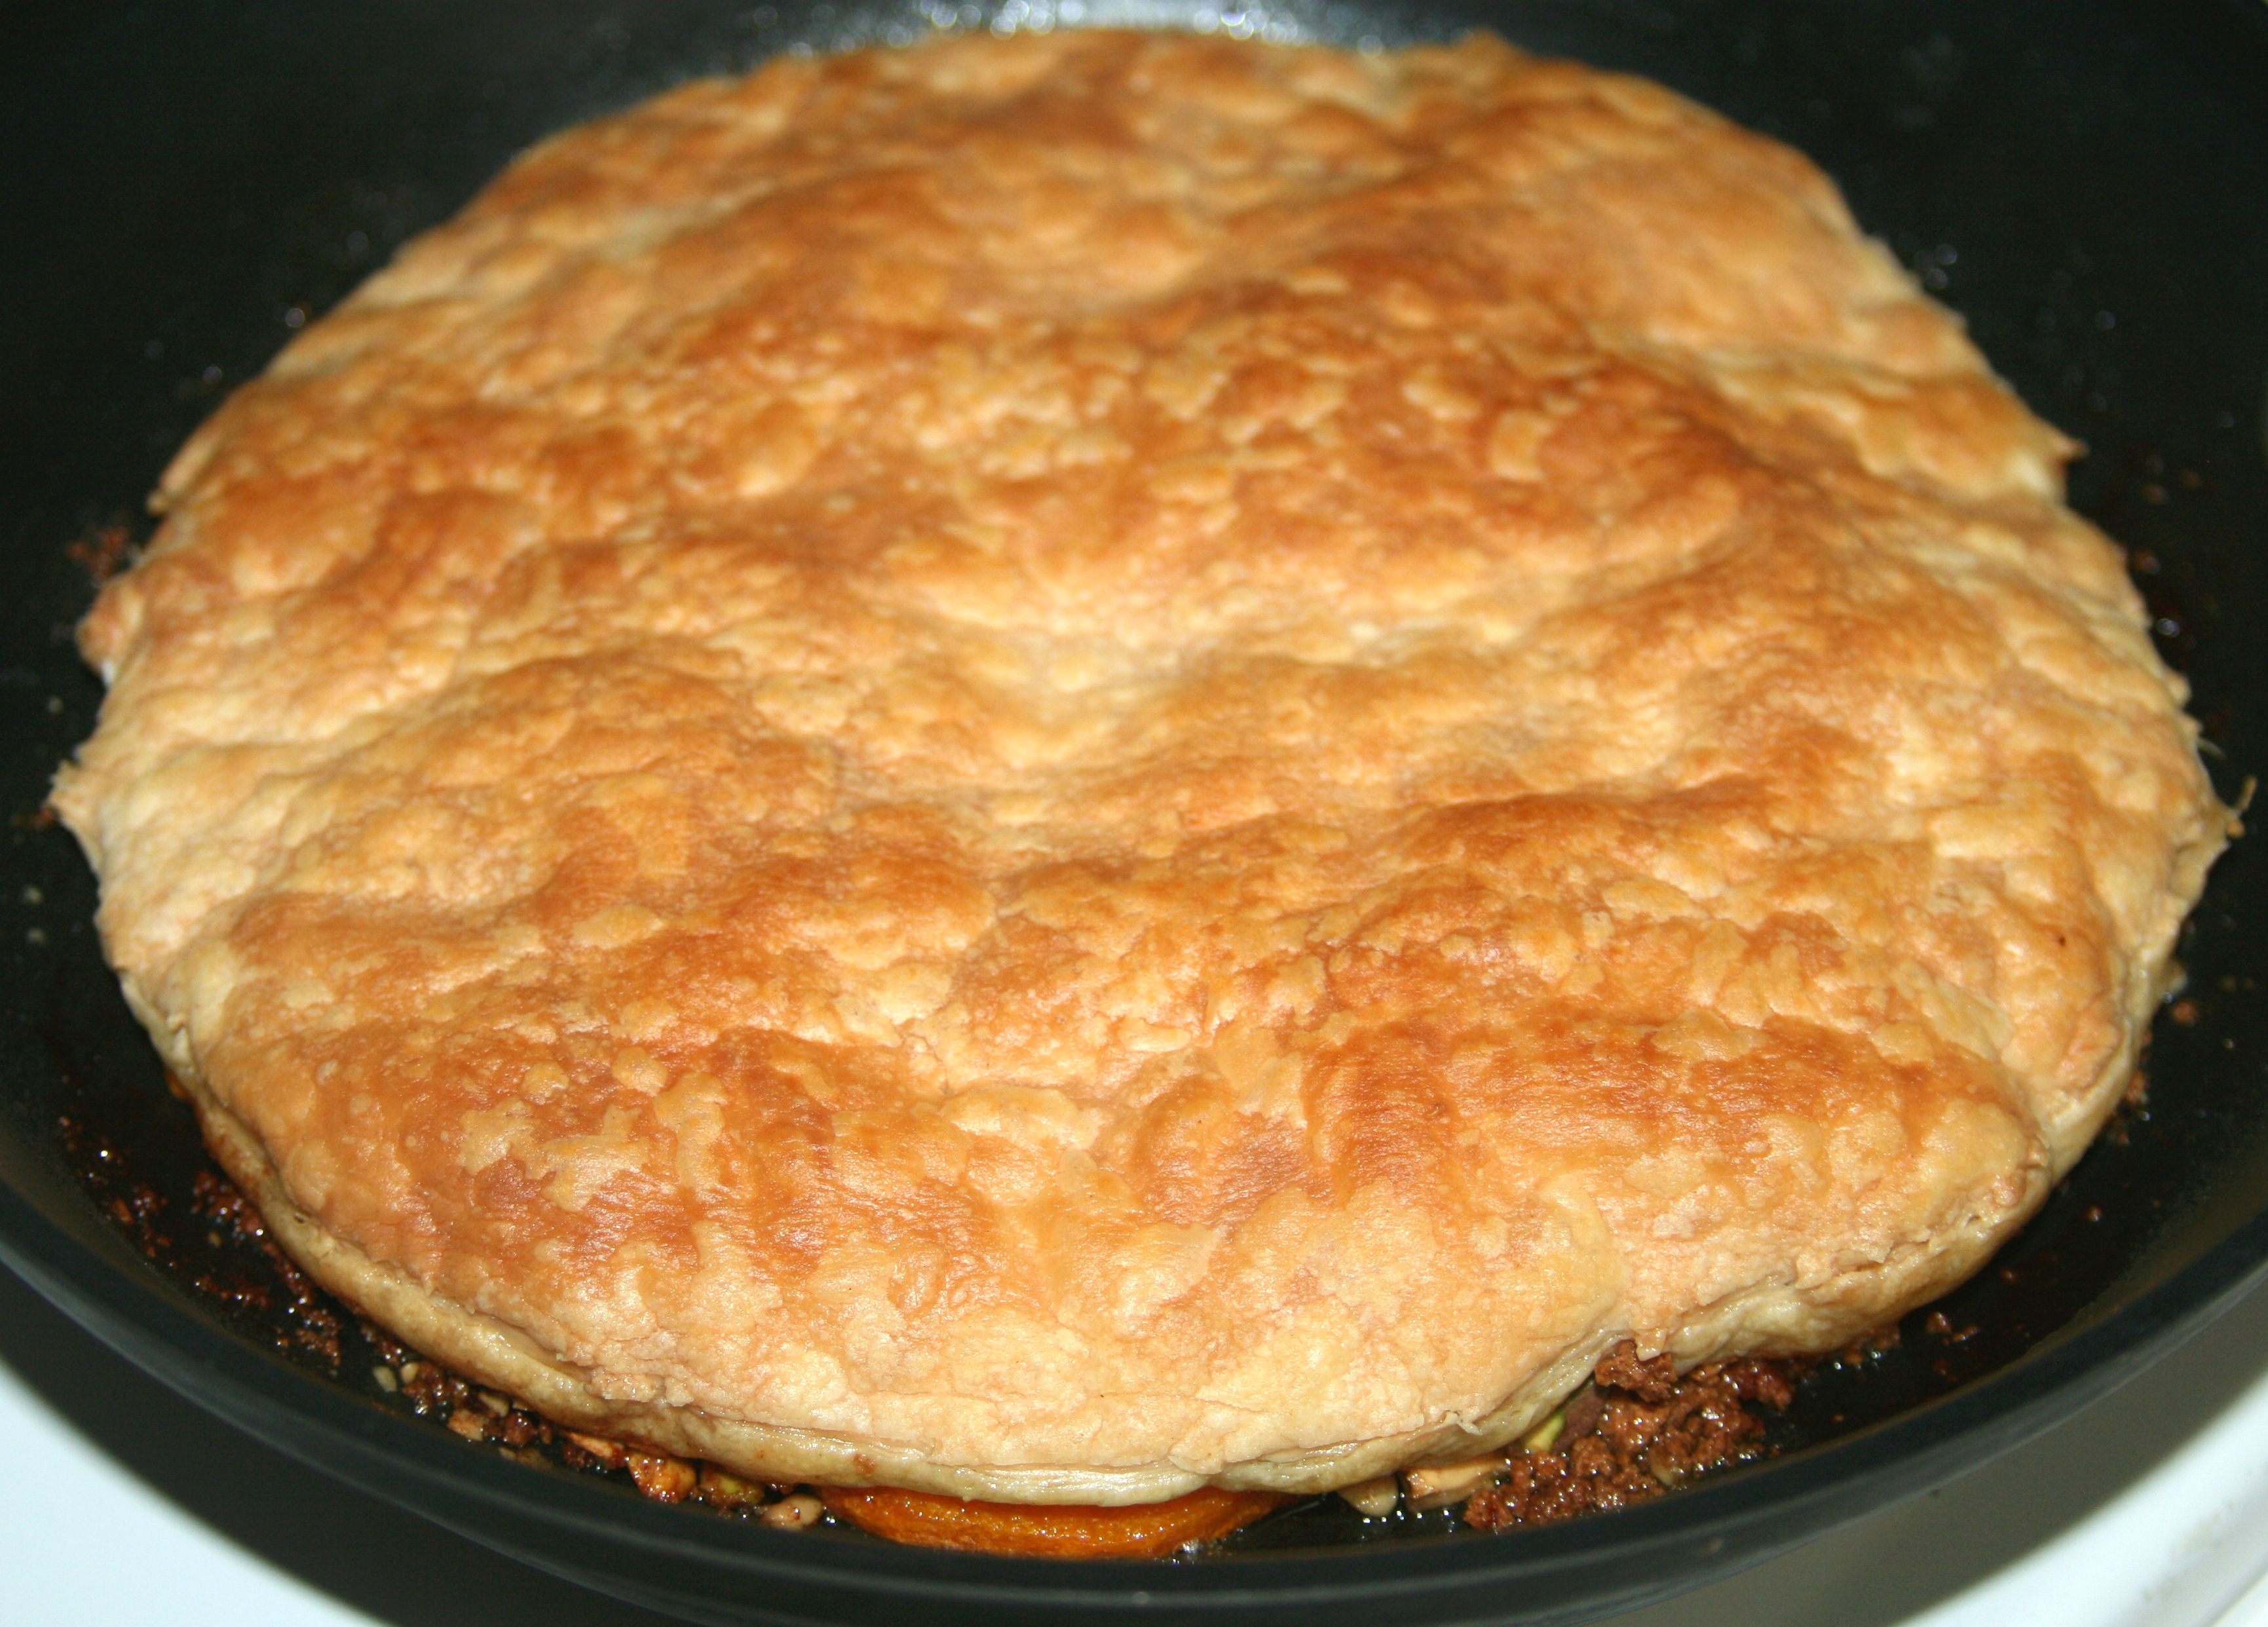
Begin monitoring the tarte when it has baked for 25 minutes. It may look done with dry golden brown puffed pastry on top, and can be removed now, or continue baking up to 5 minutes more. Baking time depends on how quickly the butternut squash cooks without burning, avoid burning the edges of the dough. *Listen. If you hear the pan’s juices drying out, a crackling sound, or if you even begin to smell a hint of burnt squash, remove immediately.
Garnish: While the tarte is baking, prepare the garnish. Sprinkle powdered sugar in a bowl. Add the ricotta or mascarpone or heavy cream. Stir then whip until smooth and fluffy. Chill until ready to serve.
5. After Baking and Plating Butternut Squash Tarte Tatin: Once removed from the oven, allow the tarte to cool down for 5 to 10 minutes so the ingredients settle into the baked puff pastry, making it much easier to transfer to a plate. Using a flexible spatula, gently and carefully slide it along the sides of the pan releasing any squash that is sticking to the pan. (Use vertical up-and-down movements with the spatula rather than horizontally swirling it around the inside of the pan. Up-and-down tends to leave the squash intact and in place, while swirling or scraping, tends to move them out of place.)
Place a broad plate over the top of the pan, wider than the diameter of the pan. Pick up the handle of the pan, holding the plate over it. Quickly and smoothly turn over the pan and plate. Place the plate down on the counter top with the pan above it and gently lift the pan straight up, not at an angle. While all ingredients should fall out onto the puff pastry, do not be surprised if a few pieces remain inside the pan, simply remove. The pastry shows their indentations so it is easy to put them in the right place.
Allow a few minutes more to cool. Use a very sharp knife or sharp kitchen shears to cut through the tarte. Garnish with whipped ricotta or mascarpone or heavy cream. Accent with fresh mint leaves. Tuck-in and enjoy every luscious morsel.